Friday, June 30, 2006

Reassembly and dingy

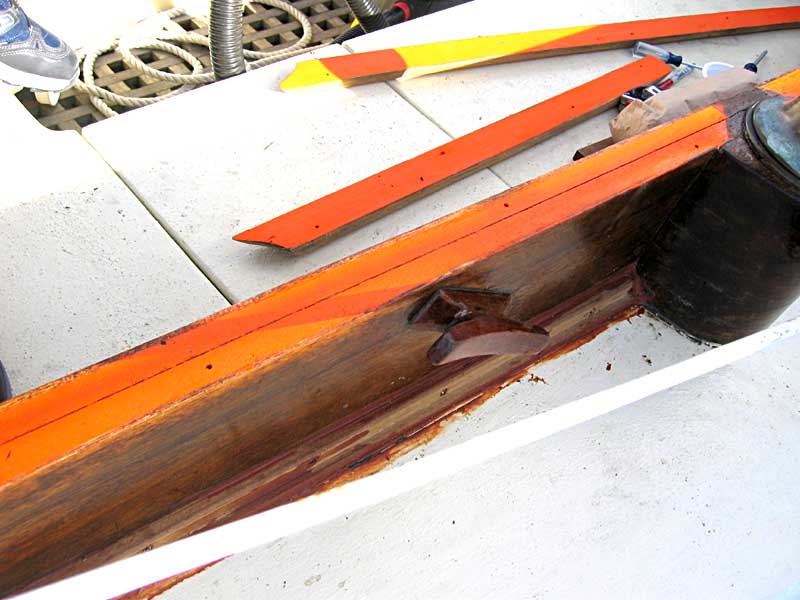
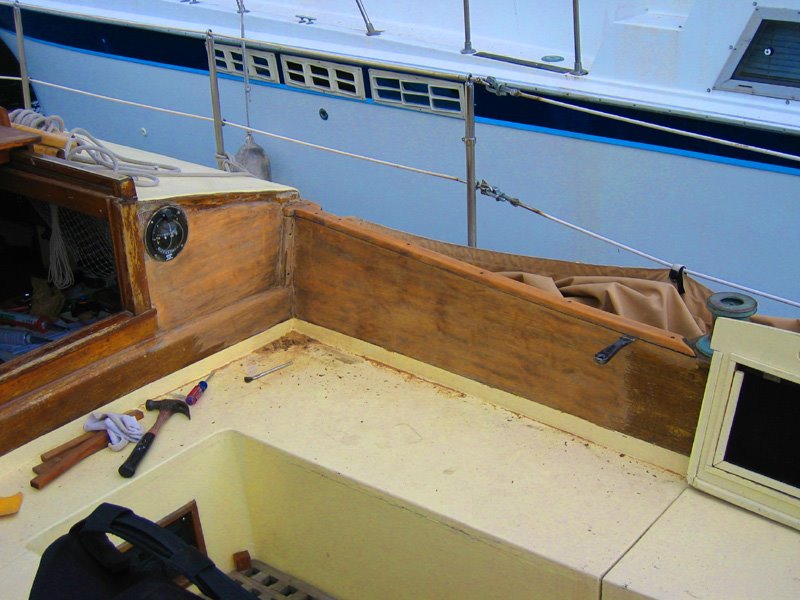
Just a good shot of the coaming reassembled, ready for sanding, oiling and varnish. Note the new trim pieces at the base of the coaming, I am very proud of those.

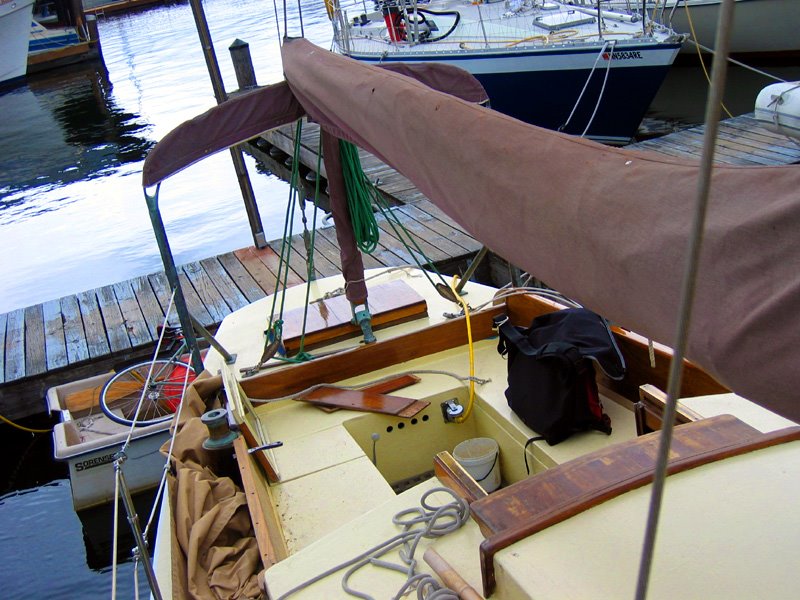
Plus I just got a new tender for Danneskjold. Patrick at CWB just got in a new donation that came with this tender, a little worse for wear. My boat came with a nice, but useless to me, Sorenson dingy. He offered to trade me, because the Sorenson is worth more for resale for the center, and this tender is much better for my boat... I might actually use this one! It fits on deck.
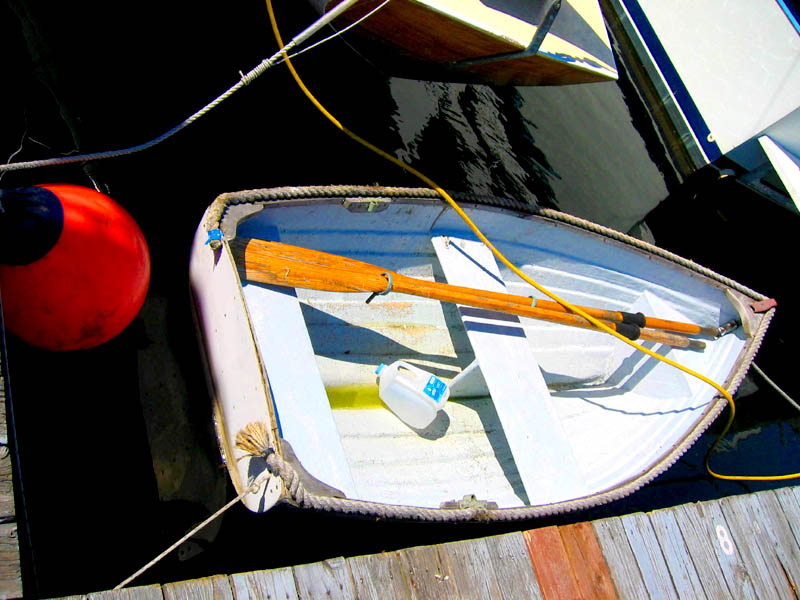
Through-hulls scare the crap outta me...

Story time.

I disconnected the drain for my hand basin last weekend (see interior pics from the first few posts for reference). I was a waste of valuable space and only 5' from the galley sink, so I chucked it.

Upon cutting through the PVC (yeah, I know...) pipe at the T with the seacock, I caught a initial flood of water. No problem, the drains still had (nasty) water from the waterline down in them. But then it kept coming, but at a trickle. The seacocks in Danneskjold need to be overhauled, I know that, and they are sticky enough that I could not turn the valve all the way off. And though it was a very small trickle, it was enough to thwart the curing of the 5200 adhesive I was planning on using the plug the end. I was stuck. And freaking out.

So i began to think of how i could stop the water from coming in long enough to let the 5200 cure. I didn't want to use a rag, because i suspect it would turn into a stinky mold farm in no time living in the grey-water pipe. I looked over and saw a small pile of expired flares... each with a small plastic cap on them. It looked like it was the perfect size to fit snugly inside the pipe to stop the water influx while I glue the cap over the outside. And sure enough, it did. I was amazed. And relieved.

Here is a shot of the situation at hand and the little plastic cap the saved me.

More coaming work

More recent pictures of the coaming rebuild project. I started to reassemble the pieces after they had been removed and rejuvenated. There was a large void in the forward part that i am making sure stays filled by using roof patch. When I took it apart there was just a big (but not filling all the space) goober of sikaflex. Upon reflection on this part of the project, I believe i should have fit in a small graving piece to bring the wood flush, and not relied on goop filler to do it, but i think this will keep the water out well too. I made my own witches brew of redlead primer for this project, and i must say, that i am happy with the results. Finding the redlead was a pain (I got it from Firefox Enterprises in Idaho, a fireworks supply company), but the home mix is much cheaper and more 'to the point' then any Kerby's like product. I didn't have a block plane at this point, so I used my nimble thumbs and a chisel to bevel the wood used to replace the coaming-to-outboard-deck corner piece. ...and an overview of the work zone. Notice other random pieces of canvas over the boat. Those are other leaky spots that are going to be attacked next. But for now they are kept dry with little homemade Sunbrella tarps. I can't stand leaks.

Just in case you were wondering


This is me.

Survey Haul Out

More old pics, playing catch-up. This is from July of last year, hauling the boat out for the purchase survey. She was surveyed by Lynn Ryster of Lode Star Marine. We spent about 10 hours looking at the boat inside and out. She was very thorough, and charged about as than many other surveyors, but did so much more than any other surveyor would have (as far as I could tell from getting price quotes). Just look at those sexy lines! It's a shame that its underwater all the time. I actually ended up helping Lynn throughout the survey, taking notes from her. She could see that I was eager to learn, and was totally willing to teach me a bit while doing the job.

Some more older pictures.

Here is the project (war) zone right after I bought her... I am getting her ready to live on.


My install for the boats' first 110 AC system ever!


Cockpit coaming rebuild

Here are the initial pictures for my coaming rebuild project. It was leaking at the junction between the forward coaming and the aft end of the house. The whole coaming side needed to be refinished anyway, so I took it all apart to rebuild all the wood and then refinish with some Interlux Schooner Varnish.

The workscape, complete with puttyknife puncturing the boat...

The bungs removed, fasteners out and old bedding being dug out. But you can see the deteriorated state of the old bedding... ick!

Wide shot of the progress:

The whole rest of the wood aft was stripped and the other coaming cap was removed too... now to rebuild it!

Chainplate covers

Here is my last major completed project.


Danneskjold had her deck replaced in around 1995 and they never refitted her with covers for where the chainplates come through the deck. I wanted to fix this problem before I tuned the rigging and sailed her. So I went to Alaska Copper and Brass in south Seattle and bought some 3/16" silicon bronze plate. Then ~20 hours later of working in a machine shop at school here, I have the finished results. I am damn proud of them.

They are fastened to the deck with bronze screws and bedded with 3M 5200. I don't particularly like 5200 or epoxy-like things on my boat, but I really wanted this install to be solid and permanent.

Intro

First post.
This blog is intended to document the rebuilding and life of my boat, Danneskjold.

Some info on her:
She was designed by Edson B Schock and built in 1936. She's 34' on deck, sloop rigged. The planking is of Honduran mahogany on white oak frames, with a redone deck of marine ply that has been glassed over. She is fastened with galvanized screws below the waterline and with galvi boat nails above. A large iron section in the keel brings her to 17,000 lbs total.

From previous surveys, she is reported to be 51' off the water at the masthead. That brings her estimated sail area to roughly 830 sq. ft. with a 100% headsail up. I am expecting her to scoot. Fast.

She was purchased by me from the Center for Wooden Boats in Seattle WA. Here are some pics from when I was lurking around the docks at CWB trying to buy her... not much has changed from these pictures, but then again, sooo much has.


Here is her interior as purchased... lots of lovely varnished mahogany inside. This is now my home. damn...


So, now lets get this started. Please continue to stop by and see the progress. I have a lot of work to catch up on posting here, but I an continuously working on my boat and taking pictures.