A blog to document the work done on my wooden sloop, Danneskjold.
Thursday, September 28, 2006
Finishing cockpit benches
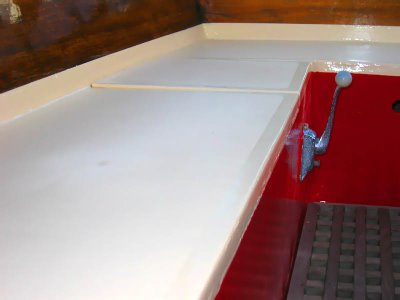
I put the final coat of nonskid paint on the cockpit benches after letting the first coat get good and dry (5 days). So, now the challenge is to not mess this coat up as it cures and we'll be set.
When you get this close, it definitely doesn't look perfect, but I want to show off the nicely radiused corners (again).
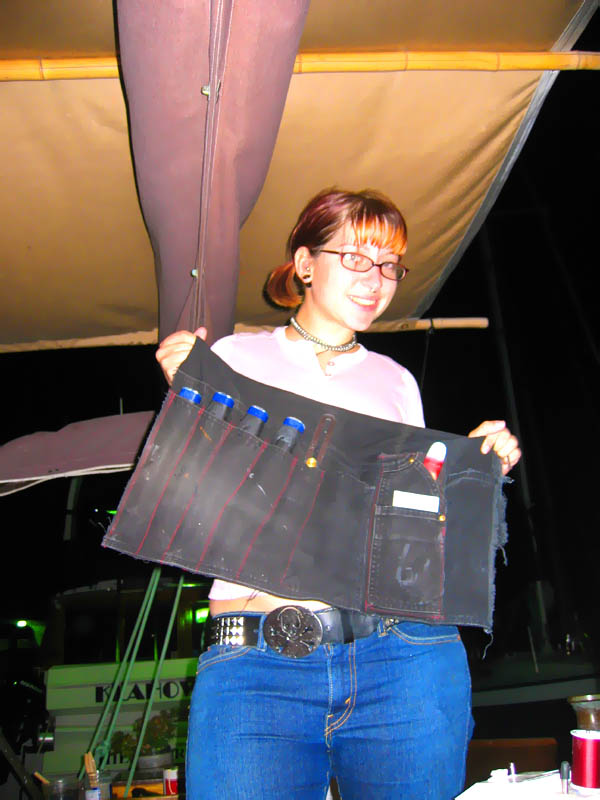
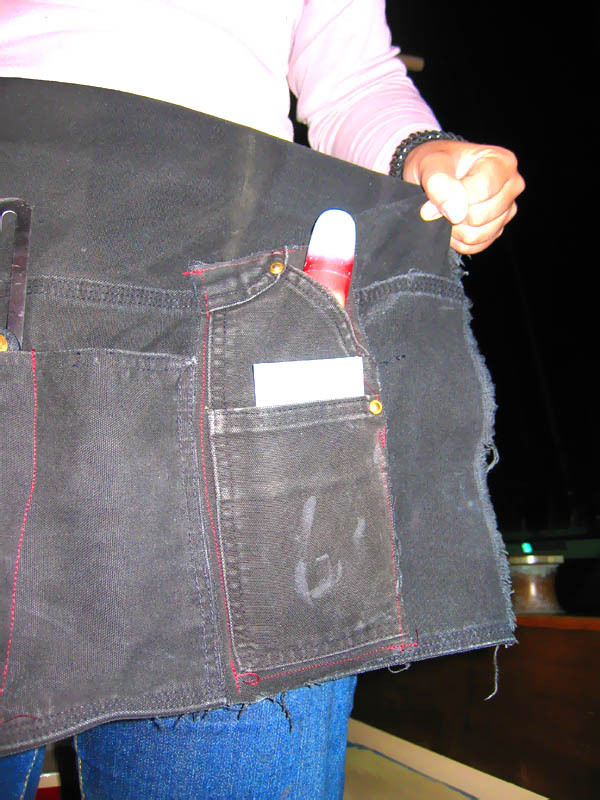
Along that same lines as the last post (focusing on Cass and her cool boatbuilding school stuff), last night Cass made an awesome tool roll for all the new tools.
They are made from an old pair of (my) Carharts, you can see the side leg pocket incorporated into the mix. Anyhow, its really cool. I think I am going to have her make me one.
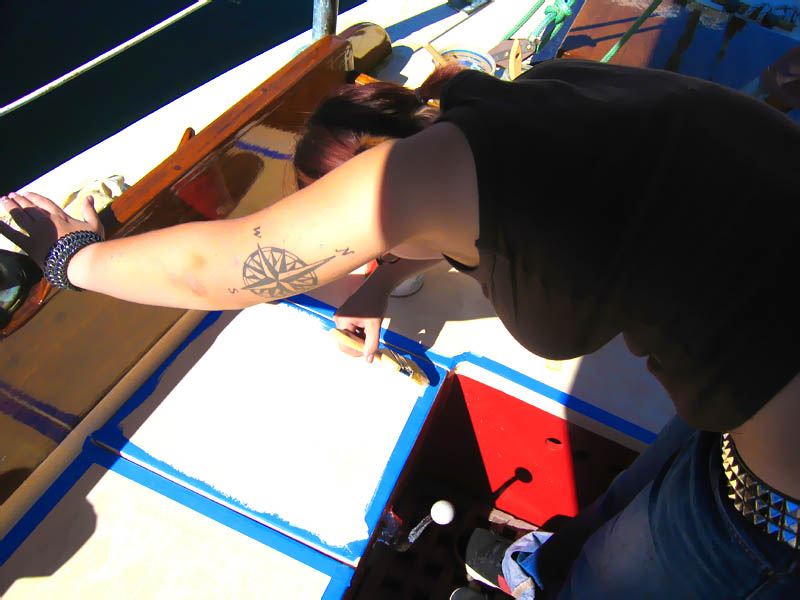
Cass and I went tool shopping last night, as yesterday was her first day of boatbuilding school. And since everyone else will essentially have the same setup, we also bought some sky blue and rust red spray paint and 'customized' them. Oh. And Cass got a Hardwicks shirt. And a compound square.
I am going to have to give some props to my friend Bill. He has been fighting a propshaft removal for about 5 days now. His strut broke and his prop gouged a hole into his hull. So, before he hauls out to fix the damage, he went ahead and pulled the prop out in the water to save lay-day fees in the yard.
Many people were surprised about the desire to pull a shaft in the water, but it was no big deal once it was done. What was a big deal was just getting it off the engine. He ended up filing the key down flush to the shaft (after 4 full days of nonstop banging and swearing). But now it is out and he wins.
Here is the engine compartment with a bung stuck in the packing gland after the shaft removal. This picture doesn't show it well, but this is a very small space with little access. You can only get one arm in here at a time.
The shaft, removed.The end of the strut where it sheared:Bill, after finally getting it out.
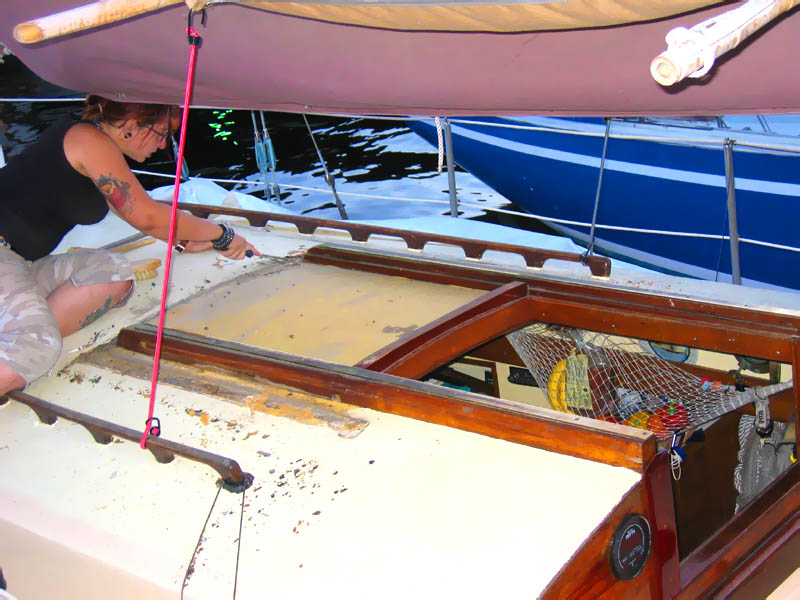
So, nonskid, round two. Same thing as before, except this time I won't do it wrong. It has had a full day to cure, so I imagine that the second coat will go on this afternoon.
The preped surface, ie, the old stuff shanded off:
After thinking about the post about the floor idea and re-reading sections from Details and How to Build a Wooden Boat, I came to some conclusions.
I was reading thoughts and design philosophies, it seems that the proposed idea for the bronze floor may not have the proper stregnth against the lever arm between the bolt in the keel and the turn up the frame to resist bending and creating garboard leaks. Also, I can see the floors allowing the deep bildge to narrow from the two arms sissoring together.
These things would be eliminated with a design like this: Much more like Larry Pardey's. But with this design, it doesn't look like the advantages of self and simple fabrication are still inherent. The extra gusseting makes it a complex 2D shape with lots of dimension and would require welding of the joints once its cut and bent. It does however retain the ability to fasten through the frames and garboards and hopefully hold better for a laminated frame. But the big loss is the DIY-ness to the floor.So... call it a draw.
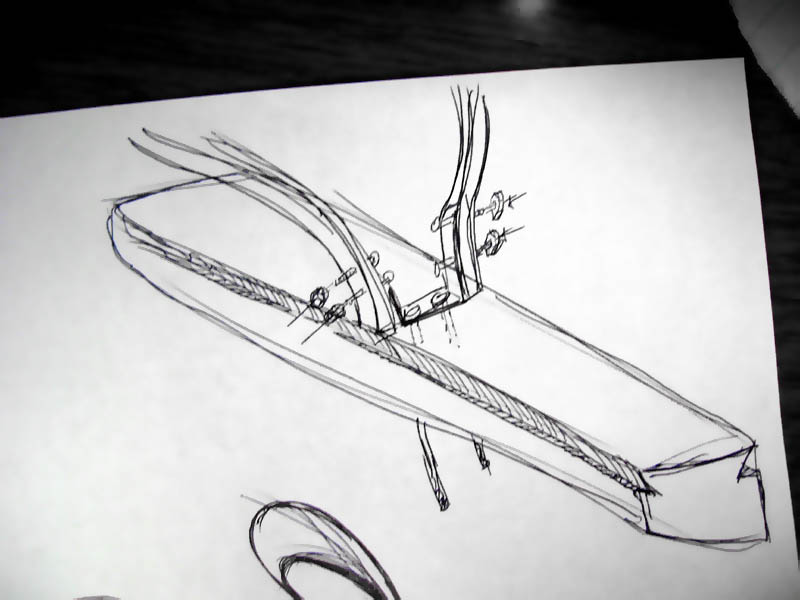
People who know me know that I am constantly become infatuated with boat things and boat prospects... my plans are changing constantly about what kind of boat I want next, or if I build it, what methods/materials will I use, and what's next for my boat. I have been currently thinking of the frames/floors I would want to put into the 'dream boat' I would like to build someday (soon).
After reading Larry Pardey's Details of Classic Boat Construction, I really like the idea of bronze floors and sawn frames... Just now I was also researching laminated frames and their weaknesses (because I don't know if there is reasonably the kind of locust stock Larry Pardey used for his frames around anymore, so I am thinking about laminating oak).
Laminated frames seen to be a good idea when combined with a fastening like roving, because the through-rivets can act as a backup in the event of a glue failure. But the floors in Taliesin are fastened through the frames fore and aft. I don't believe that laminated frames would hold those bolts placed through the lamination well. So I thought up the following metal floor scheme:
I depicts how the proposed floor would fasten to a set of frames and keel timber, with rabbit (on second look, the carriage bolts through the frames would want to have the head on the outboard side and the nuts/washers inboard). The arms of the floors are mounted to the frames flush to the fore-and-aft face, and one could possibly use the same bolts to both fasten the frames and the garboards to the floor in one fell swoop. This would mean less holes in the frames, and more synergy in the whole fastenings for the boat.
Plus, if bronze alloys take kindly to bending (which I don't know), that means that these style of floors can be produced from just cutting them out of bronze plate. Their projected pattern onto the 2D surface looks to be very simple, so one could conceivably cut them from plate with little wasted material. This would eliminate the need to pay a foundryman to cast the pieces (or for you to have to obtain the necessary tools/skills for bronze casting).
I don't pretend to really know anything about naval architecture, but this (initially) seems like a good idea.
After the doghouse removal, there was some really unfair marks left on the deck from the doghouse taking lots of paint and filler with it as it went off. I came home on Friday expecting to sand most of it out and paint, but after going through too many 120 grid pads, I decided to bring in the big guns.
I mixed up some epoxy thickened with low density fairing filler, to the suggested 'peanut butter' consistency. I applied it with an old phone card as a spatula (which worked well). Here it is all sanded 'fair' and masked for paint.
I went at it for painting on Sunday. The rain was coming and going all day, but I managed to get lucky and lay it down with a good couple hour window for it to set up.
I finally got back to working on the fastening on the bow this weekend. The project frankly is still scary, and I keep avoiding it. But on Sunday I mustered some courage and sunk the drill into my hull.
Most of the holes ran strait and well, but two are butted so close to the shelf that it will be hard to get a nut/washer on it. One was supposed to go through the shelf, and ran too low, and one was supposed to be above it, but it ran low too. But, it doesn't look too much like buck shot on the interior.
Regardless, here is the interior and exterior shots of the holes.
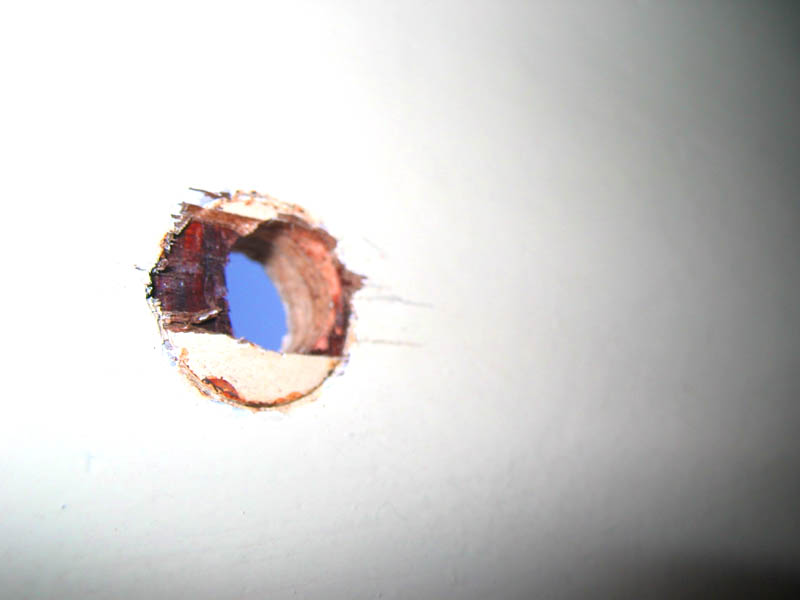
So, there was rain predicted for last night, and boy were they right. As I got home Cass and I took the flanges off the two portlights that have been the biggest leakers so far. I basically just cleaned off the old bedding compound, scraped out the small cracks around one hole, and gave everything a good coat of roof patch. That should hold until I refinish the starboard side like the port (maybe not until after the winter).
In the pictures, everything is really dirty because I have my toerails and other misc wood stored in the channels on the stbd side, all covered with a white tarp. Rainwater collects there and thus all the dirt does too. I hope I can get the rails installed soon so I can have access to those channels for refinishing.
But, when the rain came last night (and boy did it ever), nothing topside that I could find leaked. This was the first major rain testing the fixes I had done on the handrail, fore hatch glass, and the other portlight rebedding. I'm very pleased that everything held.
In this picture, the wok you can see at the bottom is placed there when it rains to catch the water that drops from the portlight above it. It comes down behind the trim board and drops off the carlin under the hanging knee. But this morning, there was nothing in the wok! Yay!
Last night, Cass was preping a small piece of trim on the companionway doghouse for refastening and varnish. This little bit of trim has been loose and on my to-do list since I bought the boat. Cass was looking for a little woodworking project, and I thought that stripping and re-bedding this would be great. But as she takes it all apart, we find a decent amount of fiberglass delaminaition around the doghouse. I grab a little flap of the d-lam and pull... and *rrrriip*, I tear off a large swath.
Here is the resulting carnage. Atop the house you can see the trim bits Cass was working on.
After consulting the local fiberglass expert on the dock, I find that re-glassing this house will suck. It wouldn't be too hard, but I really didn't want to spend that much time and effort on a piece that is obviously not original and looks bad. But something needed to be done, because the water getting between the glass on the house could easily reach the deck, and that would be a big problem.
After some thought, I finally thought, 'what's even better than fixing a problem? Removing a problem!' So that's what we did. We took off the house. The slider is designed to work without one, and the only reason I think it was there was to fill in the space over the hatch when there was a hard dodger on the boat (which also looked bad).
So, off goes the doghouse!
And its gone! And looks better!
So, now I have the more traditional look of the naked sliders across the deck. Much better... now i just need to fill the fastener holes in the deck, fair in the edge created by the glass at the deck and paint.
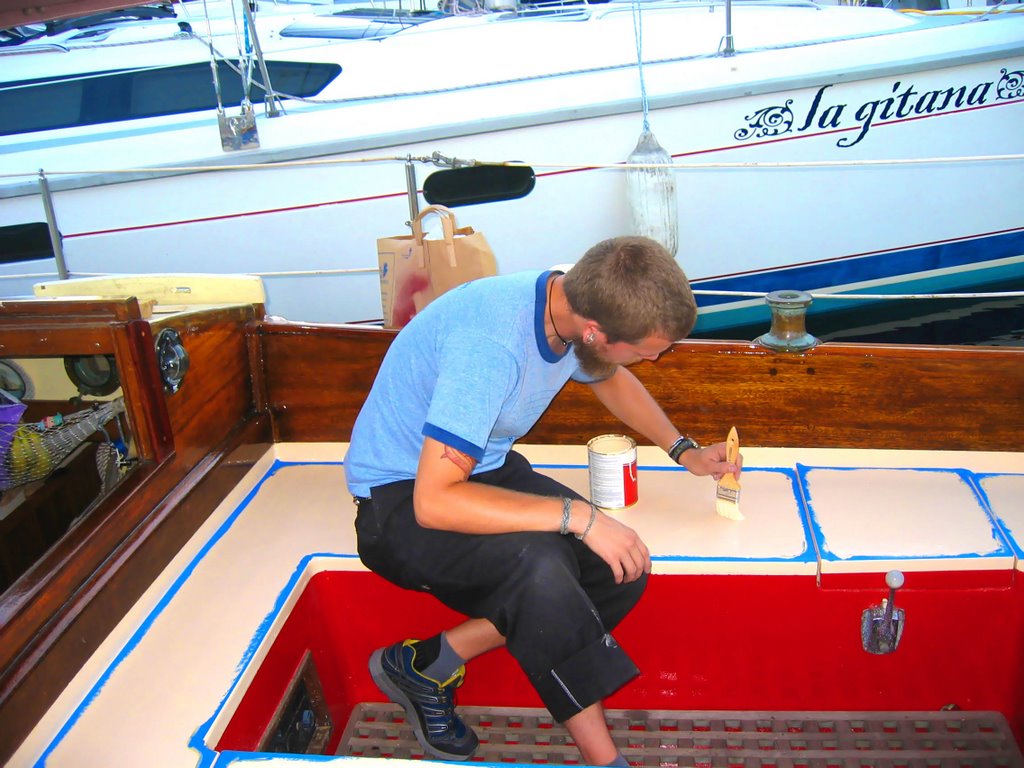
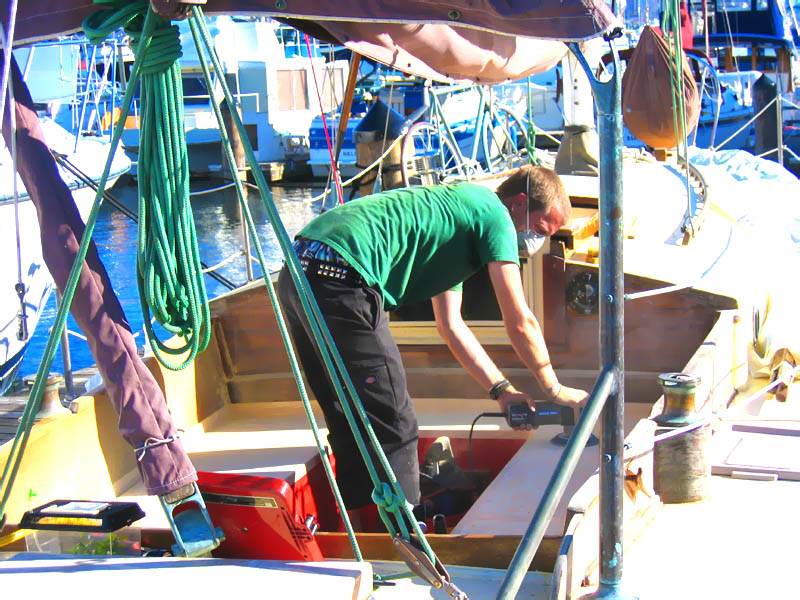
More 'long story short' time. When I painted the non-skid in the cockpit, I painted the 2nd layer too soon atop the first one... so the top layer skinned over and the bottom layer has remained gooey. I thought it just needed time, but the top layer had sealed all the solvents in and they can't kick off and escape. So.... I spent lots of time (As well as Cass) scraping and sanding all the paint and nonskid off. It sucked. I spend lots of time putting it down, and now I spend more time removing it, and will spend more time doing it all over again. But now I know not to overcoat too soon. Painful lesson learned.
So, here I am in my own little personal dust storm.
I went to the hardware store that has a good bronze selection and bought some more necessary hardware that I'll need soon... I also got nice little bronze round heads for fastening the Plexiglas to the newly varnished hatch. The old ones were stainless, and I really didn't like how that looked. Bronze is much classier. Long story short, I masked off the edges of the crack well, both top and bottom.
Then I squirted in some clear silicone sealant (3M marine) and fastened the glass over it. I then smoothed the fillet with my finger and ripped the tape. The best thing is is that the glass is bedded and you can totally still see the wood under the glass at the edges... better than having anything opaque in there! I love it!