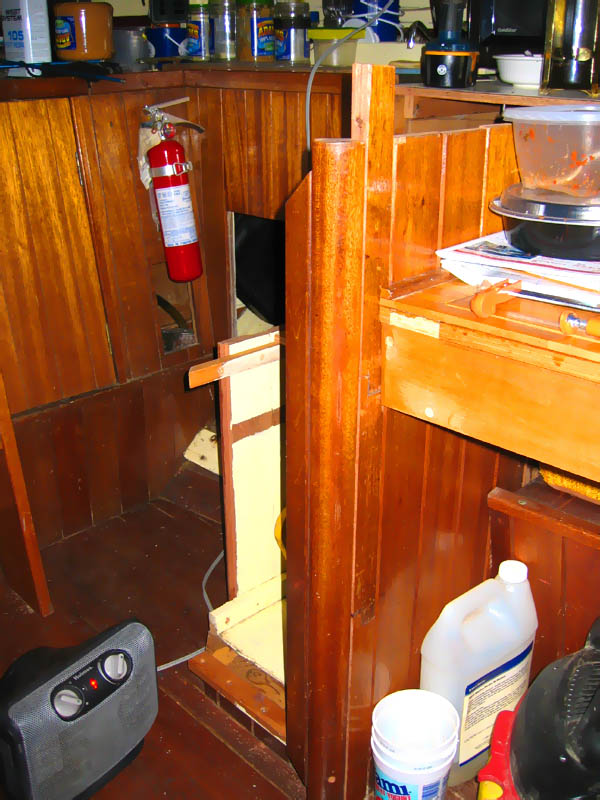
Last night I trued up and installed the extension piece to the galley counter. It worked pretty well, now I just have to assemble the end pieces around the end.
In the effort to rebuild the end, I put the base piece in which the bottom will fasten to... the old position was at the edge of the paint line.
I have been spending lots of time on ebay lately... getting old tools for steals. Here is the haul as of late. I'm such a gear-queer.
I got this bitchin' JT Weatherby 2 3/8" slick (framing style, not firmer):
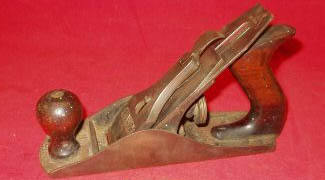
A awesome Type 13 Sweetheart Stanley No. 4 plane:
And the killerest deal of all, a Zyliss Vise (z-vise) setup. This one was a hail-mary, I just bid the minimum and left work for the day. Came back in the morning and got a $350 all-in-wonder Swiss Army (literally) vise for $50. Rock on!
I have been rebuilding from the destruction incurred last week... I am trying to widen the space for the stove, which means moving the inboard side of the counter out ~2".
So now with the lap-panel pieces that I cut from the front of the stove opening, I am making 1.75" boards for the extension. I disassembled the side and have fabbed up the wood. Here are the individual strips, none of the wood I have is long enough for the full back piece, but I want to use the same wood (I don't want to have to match the grain/hue). So I am jointing three pieces together to make the full length one.
Here are two of the individual bits. I am using this rabbet-ish joint... I am not super happy with how it looks on the outside, but I wanted to try this before I attempt an angled scarf. You can also see my super handy mini-square.
Then I glued them up (with no available clamps... this is probably a major contributor to the less-than-awesome look of the joints).
And here I am planning the boards to made them blend together... I was raining and damn cold out, so I am doing the work inside the cabin. More on this project soon.
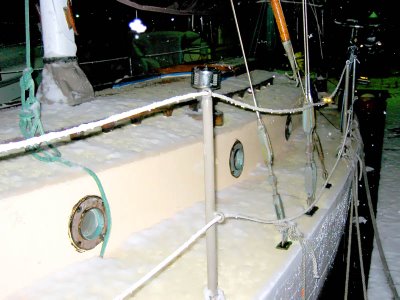
We have snow over here in the PNW... and its sticking a little but at the marina.
Its very pretty, but makes life on the boat a fair bit harder (transport, heat, treacherous docks...). But you might as well enjoy it, its here no matter what!
So, following the last post, I got all the rough cuts for the half-lapped rabbet trim. Its looking good so far, I just need to clean up the faying surfaces better with some hand chiselin' for the finished product.
Again, I am cutting the rabbits clamped to the companionway ladder, not on the dock like my earlier follies.... Here is the ryoba making short work of the face cut.
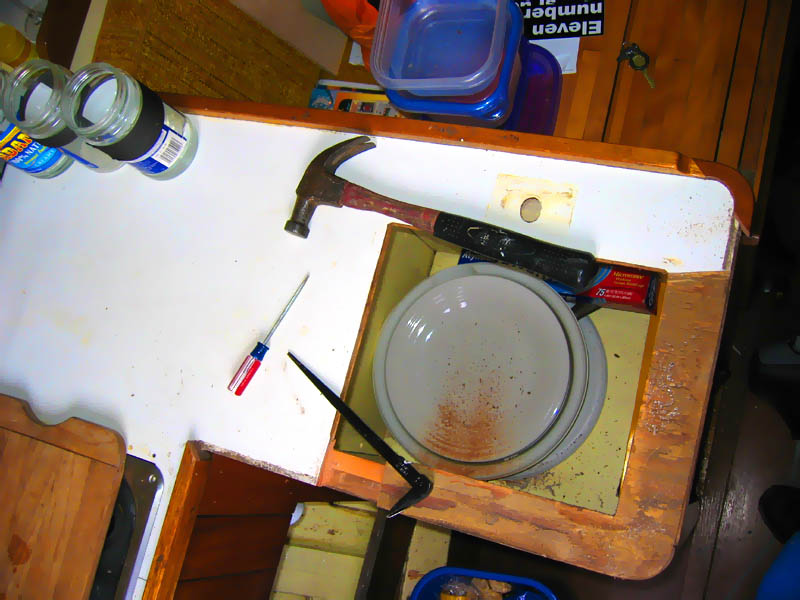
Here are all four pieced rough-fit together with the sink (nevermind the soup bowl). The hole on the left will be an inset silverware tray. Another piece of wood will fit flush in the gap as a lid.
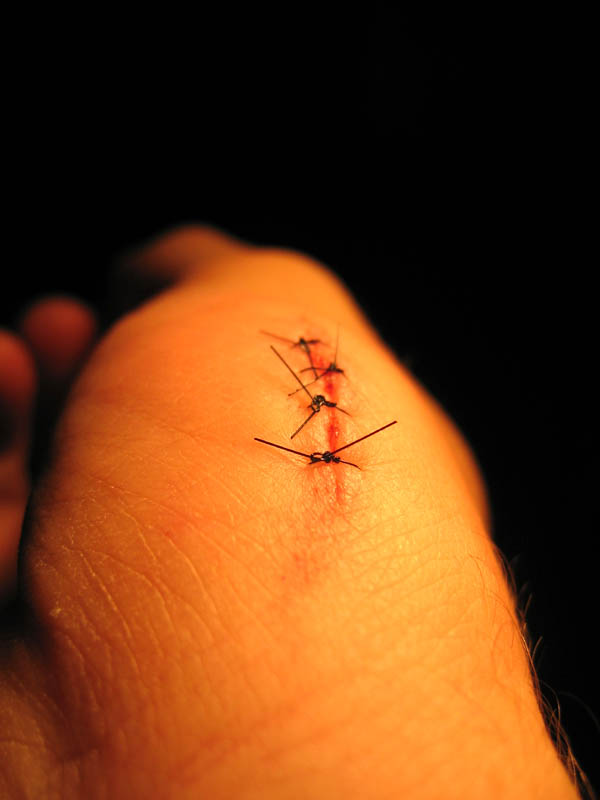
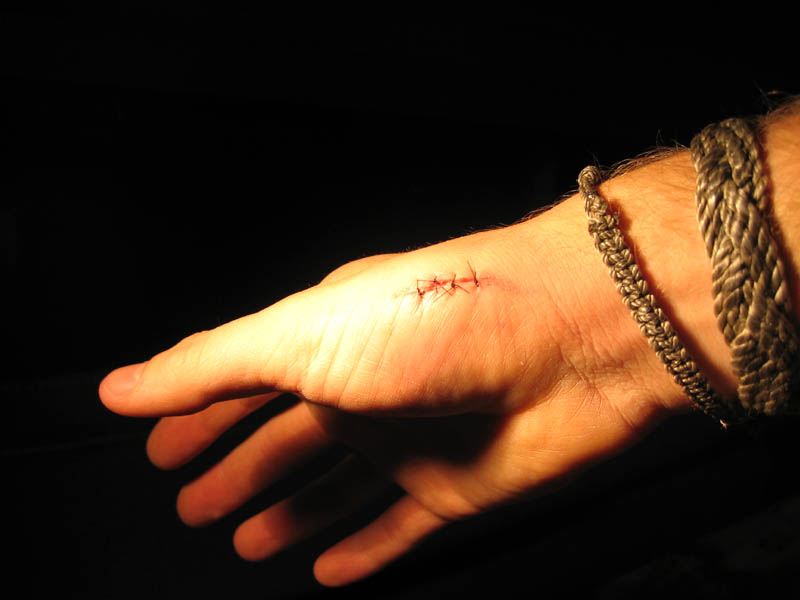
So, on Saturday, I was cutting the rabbits into the padauk for the sink trim with the Dyzuki saw, and I cut into my hand. Deep.
I had the wood on the edge of the dock, with one knee and my right hand holding it stable. I had cut the shoulder to the rabbit, plus some kerfs down the edge. While cutting the face of the rabbet (bent over, on the dock, cutting towards me, sharp saw... getting the picture?) I got to the end of one of the kerfs and the saw leapt out and slashed across my palm near my thumb.
I dropped the saw and stammered back, clutching my wrist. After some mild confusion and indecision, I went to the shore head and washed it out and controlled the bleeding (a lot of it). I managed to yank Cass out of work and we headed to the ER.
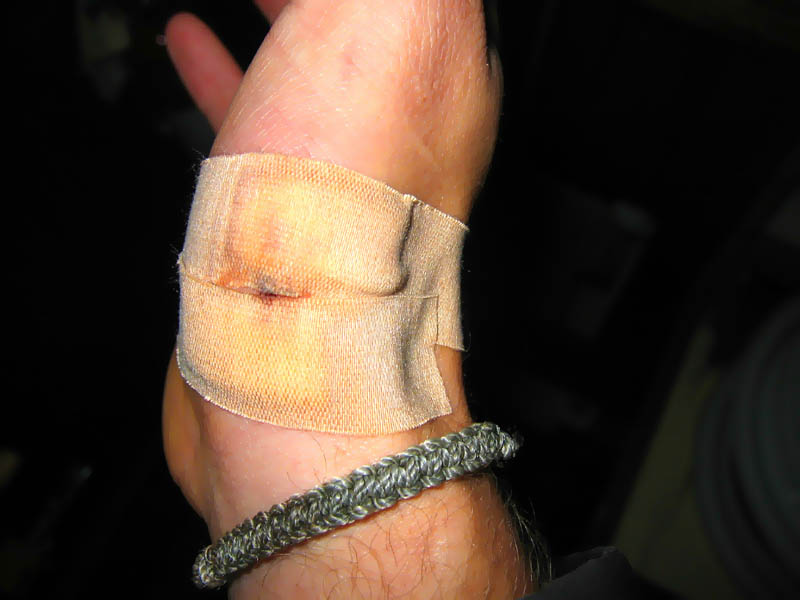
There we sat... and six hours later I left with four stitched in my palm, covered in bandaids.
So, I learned my lesson. The remaining cuts were done with the wood clamped to a good vertical surface. They also came out much better, and less bloody.
This weekend began the galley remodel for the stove. This is removing the old sink and making room for the new stove in its place.
Here is the beginning of the scene, with the sink already out.
I first removed the trim molding and started cutting away the p-lam top. I'm getting my dished dirty...
I'm learning about how the interior jointery is made in this boat as I go. Here is my nice little Japanese cats' paw coming in very handy pulling small ringshank nails in the countertop.
Then I removed the whole top, bit by bit. This is the first in a series of pictures of the jointery with my saw stuck in it.
Then I cut out the back panel after removing the middle shelf.
Then I marked the new level for the middle shelf, which will hold the stove at the correct height, and cut the front of the lapped paneling out just above the mark.
Leaving this...
Cleaning up a bit, I put the shelf back in and put some dishes away that had been spread about the cabin for the project...
This is when I noted that the space opened is not quite big enough for the stove and the heat gaps required... so I now need to work on moving the outer side of the box out another ~2" or so.
So, with the dutchman install, I let the epoxy cure, and now I just fair it and patch the seam with roof-patch (for the winter... temp fix, remember?).
Here is the rough fit wood. Man it looks bad. I don't like my boat looking like this...
The work zone in general...
After removing big chunks with my chisel, I plane it flush. I don't much care about absolute fairness, but I don't want too much of an eyesore on the side of the hull. You can also see the upper seam where the paying compound got all bunged up from the tape on the plastic patch. Crap.
Then I filled the gap with roof patch. Gloves make the best applicator. That's good stuff.
So now I have a ugly black streak on my hull where rot once was... waiting for the summer for the real fix.
In preparation for the stove install, I need to move the fuel metering valve on my Bristol stove to the back of the stove. This is because I am installing it athwartships in the boat, and the stove is designed for fore-and-aft instalation. The valve meters the diesel by gravimetrically keeping the oil level in the valve body the same as the burn chamber. If the valve falls below the same level as the burn chamber, it will starve it for fuel. This would happen if the valve was still on the side of the stove and I was at a heavy starboard tack while cooking. By putting the valve on the back of the stove, I am keeping it in line with the chamber regardless of the heel.
Blah. Long description.
So, I removed the valve, and I now need to get more copper fuel line and swage fittings.
Given that there is no effective light to do outside work on the boat past 4:30 these days, I decided that i would try to do some work in the morning and stay at 'work' a little later in the evening.
I wanted to made some more of the seams watertight for the winter... I don't trust that there is any more weather to do full recaulking on seams, so I opted to partially reef them out and fill the gaps with roof patch (blackjack). This should keep the water out, but it will look awful being black goo on a white hull. But a dryer boat is worth it.
So I loaded up the dink with the necessary gear and rounded to the non-dock (stbd) side of the boat.
Then I went to work. I didn't take the camera with me (I didn't trust that everything would go smoothly and I would keep the water on the outside of the boat while working). But I basically reefed the seams, taped them off, and filled them with roof patch. I did find the seam that I know is responsible for a decent stream of water coming in when it rains. I pulled out a bunch of wet cotton from it and the wood was damp. Though I didn't dig very deep into most of the seams, I didn't find any more rot spots, which makes me happy.
Here is the dink with the pile of tape in the bow and bad cotton/paying compound near the stern. And I really enjoyed working in the morning sun of a brisk fall morning.
Cass and I bought some wood for trimming in the sink during the weekend too. For the main part of it, we are using padauk again... beautiful red wood.
Last night I made the cut list for the piece we bought, and Cass is taking it into the wood shop to run it through the jointer, plane the surfaces and rip the 1.5" strips for the install.
So, here is Cass with the wood and the cut list taped to it. Man it rules to being dating a girl going to boat building school.
This weekend Cass and I worked on getting the new sink installed in the galley, making room for the new stove.
The first order of business was to install the new drain line. So I cut the old PVC one right as it exits the cabin sole.
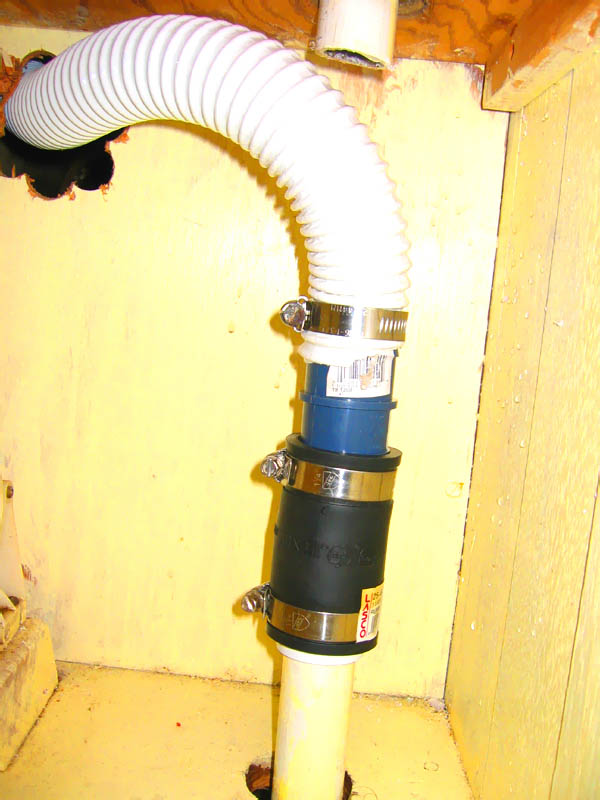
And after a trip to the hardware store with a sample of the new drain hose and the old PVC, we managed to Frankenstien an adapter together. The key is that it involves nothing permanent, so we can take it apart and maintain anything without any destruction.
The adapter is a double side hosebarb to the rubber sleeve, to a PVC union welded to the old pipe. Fun...
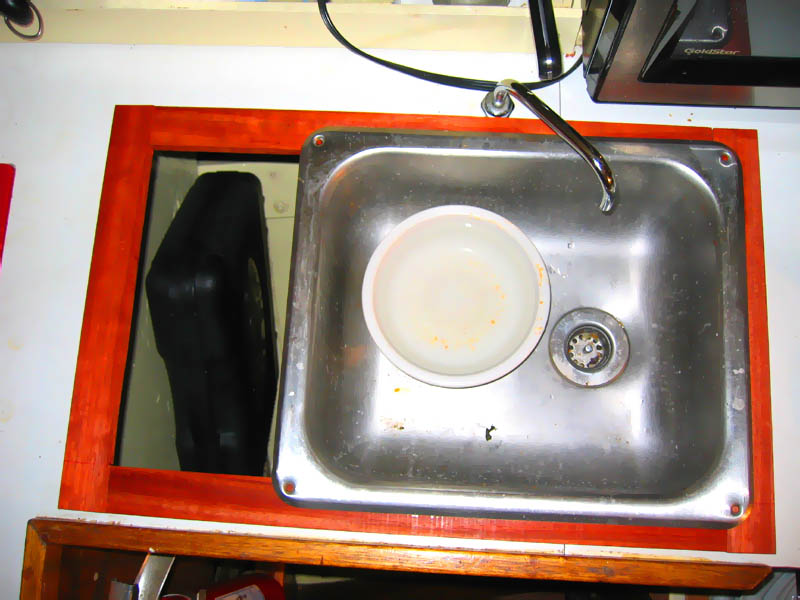
Here is a shot of the galley mid-install... a mess. You can see both sinks, and I believe we are getting the freshwater feed hooked up to the new sink.
And this is how it looks now, but we covered the hole with a cutting board until the stove goes in.
So, for the previously mentioned pocket in the hull, I put in the second graving piece last night. It was interesting, given that it was dark at 5 pm, and Cass was holding the flashlight for me while I worked quickly in the cold to get the piece in. Luckily I had already done lots of the major shaping of the hole and the dutchman, so it went quickly.
It's basically the same dance that was done for the lower bit, but quicker and colder.
I decided to mix epoxy out of two MAS epoxy Double/Bubble packs.... much easier than mixing form WestSystem jugs.
I wedged it from below on the other dutchman.
Here is an idea of what it was really like out there... this is a picture without the flash, not an great work environment. Good thing I am moving on to inside projects.
So, while working on the boat this weekend, I saw a dent in the hull from the top of the fender. Upon poking at it, it turned out to be a rot pocket. poop.
So, I dug at it for a while with my wrecking chisel (fasteners in the way) and came to this:
A hole. Full of rotten wood. Its actually about 4"x2". Given that it was a dry day (defying the forecast) I went to quick work opening the hole up and making a nice geometric hole to put in another set of dutchmen. But it needed more....
I Cass invited a wooden boat guy that we both know well for a second opinion. The long and the short of the discussion is that I should put a graving piece in to hold it for the winter, and replace the planks in the summer with the good weather.
To summarize the work in pictures. I carved out and test fit the bottom dutchman:
Then I put some borate salts in the void with a little water to spread it around, then dried the area as best I could with the heat gun. I then added some CPES to the area to assist in the bonding epoxies grip and for stability through the winter.
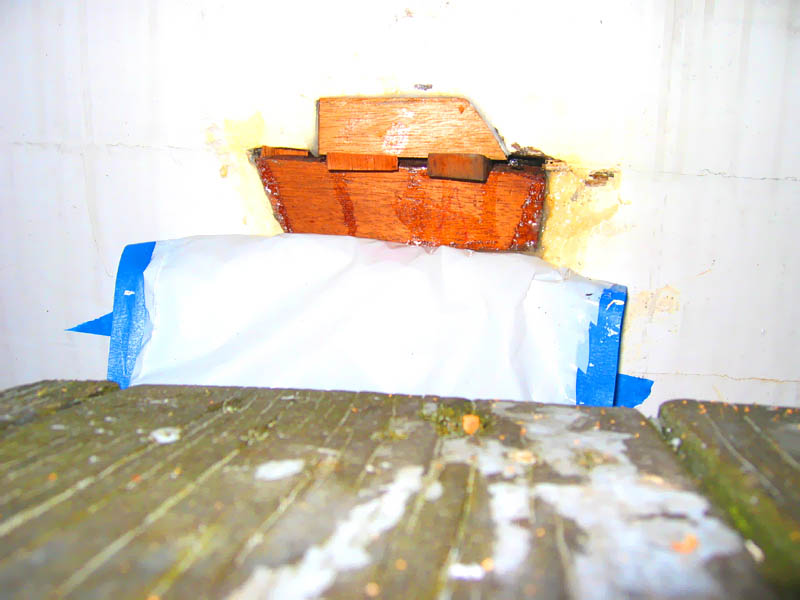
Then I epoxied the bottom piece in, holding with the wedges. Then the rain came and I taped a plastic patch over the spot and retreated inside.
But, this particular find bummed me out. A lot. But talking with Paul really helped. Words of wisdom and help: "This is not a big deal, don't let it get you down." "This will be a really fun little project in the summer, you'll learn to put in planks." "This stuff happens and knowing how to fix it is a good skill to learn ASAP." All these comments are little mantras I say to myself while processing this 'surprise'.
So, the good things to come of this: -I found it and I have good people to help me fix it -It only took me ~6 hours to put in this dutchman, as opposed to about a week for the first one I did... I'm getting better! -Using this as a catalyst, I will learn to plank! (the most exciting part of it... it is almost worth having the rot pocket in order to learn this skill!)


 In the effort to rebuild the end, I put the base piece in which the bottom will fasten to... the old position was at the edge of the paint line.


 So now with the lap-panel pieces that I cut from the front of the stove opening, I am making 1.75" boards for the extension. I disassembled the side and have fabbed up the wood. Here are the individual strips, none of the wood I have is long enough for the full back piece, but I want to use the same wood (I don't want to have to match the grain/hue). So I am jointing three pieces together to make the full length one.
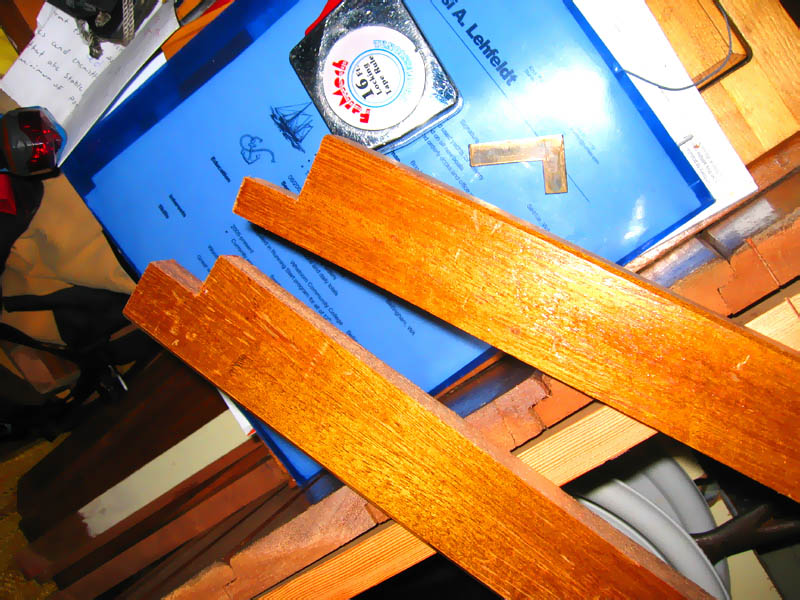


 Its very pretty, but makes life on the boat a fair bit harder (transport, heat, treacherous docks...). But you might as well enjoy it, its here no matter what!


 I wedged it from below on the other dutchman.